This article is written for: Zello Work Zello Friends & Family.
QR Assist lets you create scannable QR codes in the Zello Management Console that serve as help points for people who need to contact your frontline. QR codes can be printed or displayed digitally and are linked to a specific channel in your network, so requests are routed to the correct team when the code is scanned.
This article covers how to create and delete QR codes for use in QR Assist.
Note: Throughout this guide, 'Dispatcher' is used to refer to the person who potentially accepts and acts on a request. 'End user' refers to the person who scans the QR code and requests support.
Setting up a dispatch channel for QR Assist
In order to create a QR code you must set up a dispatch channel in your network that you will link the QR code to.
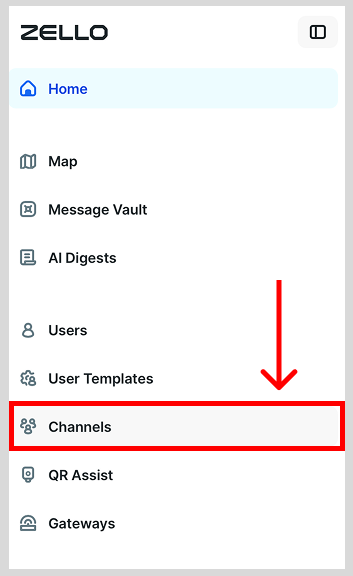
- Sign in to your management console using the URL [yournetworkname].zellowork.com.
- Select Channels.
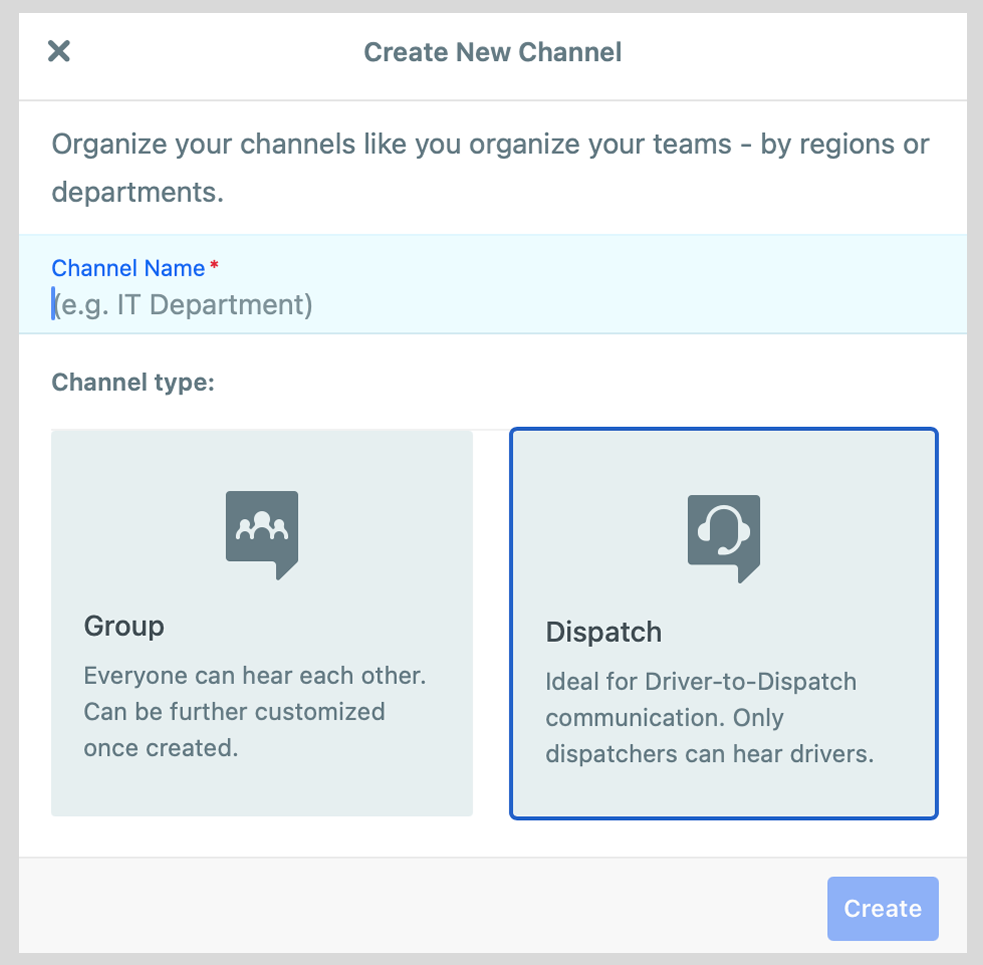
- Select + New Channel.

- Enter a name for your channel and choose Dispatch as your Channel Type. Click Create.
- Select the users you would like to add to the channel to serve as dispatchers and who will be accepting requests through QR Assist. Click Add dispatchers.
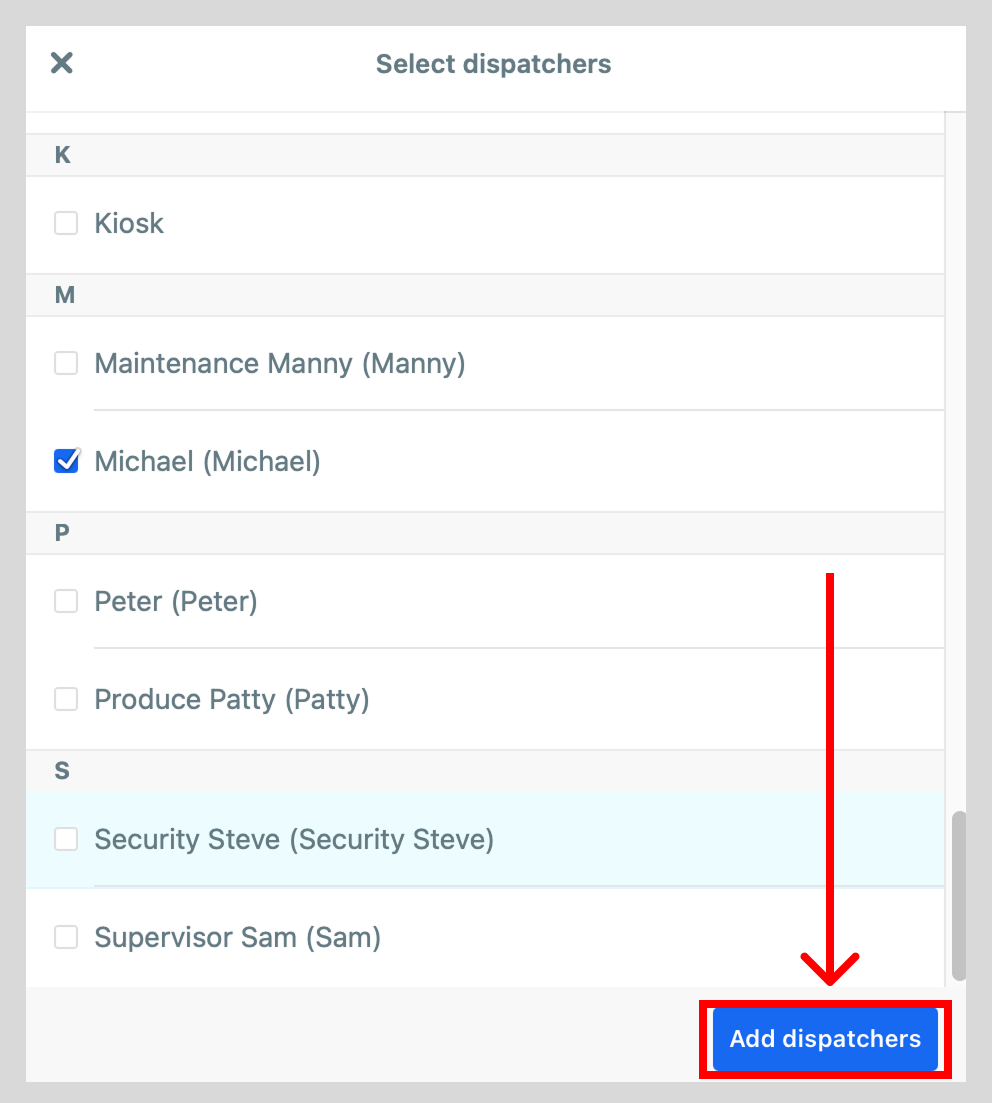
Note: You will be prompted to add drivers to the channel. For QR Assist, you will not need to assign any drivers to the channel and should simply click the X in the upper left hand corner.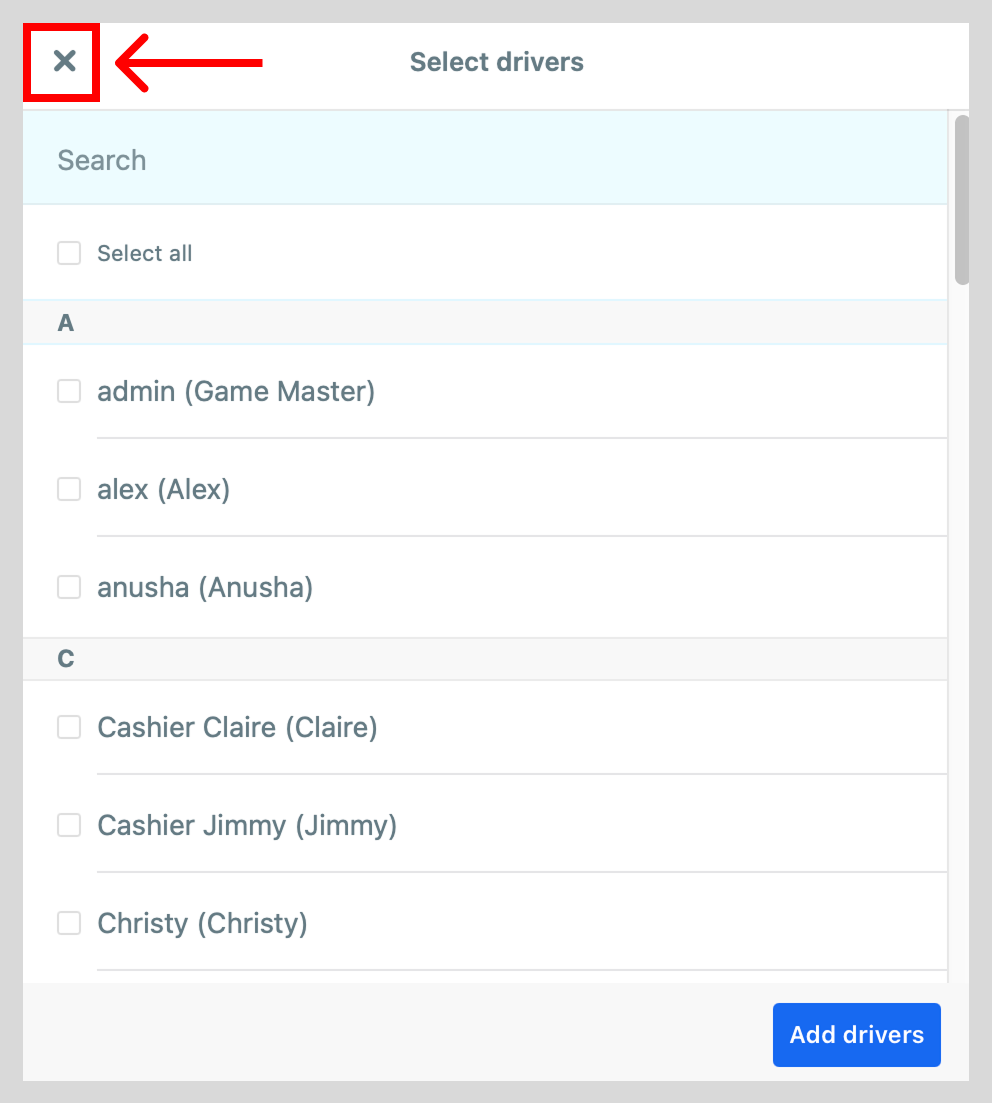
Setting up and understanding role types for QR Assist
Choosing the proper role types is centrally important to using QR Assist. Role types determine who can and cannot communicate with one another. What follows is a guide for how to select role types for the dispatch channel along with a description of what each role type entails.
Please note that no matter which role type is chosen, the end user will not be able to speak with the dispatchers.
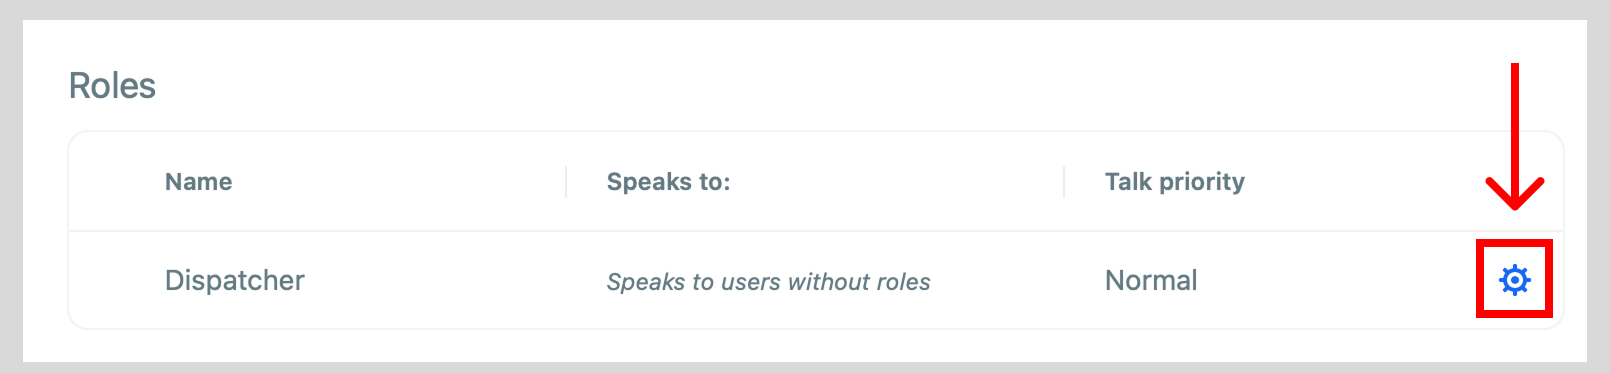
- Within the Management Console, locate the dispatch channel that you will be using for QR Assist.
- When viewing that channel, you will see a section for role types. Click the settings symbol.
-
To change role types, click the text box listing the role type to open a drop down menu. Select the role type that is appropriate for how you want to use QR Assist.
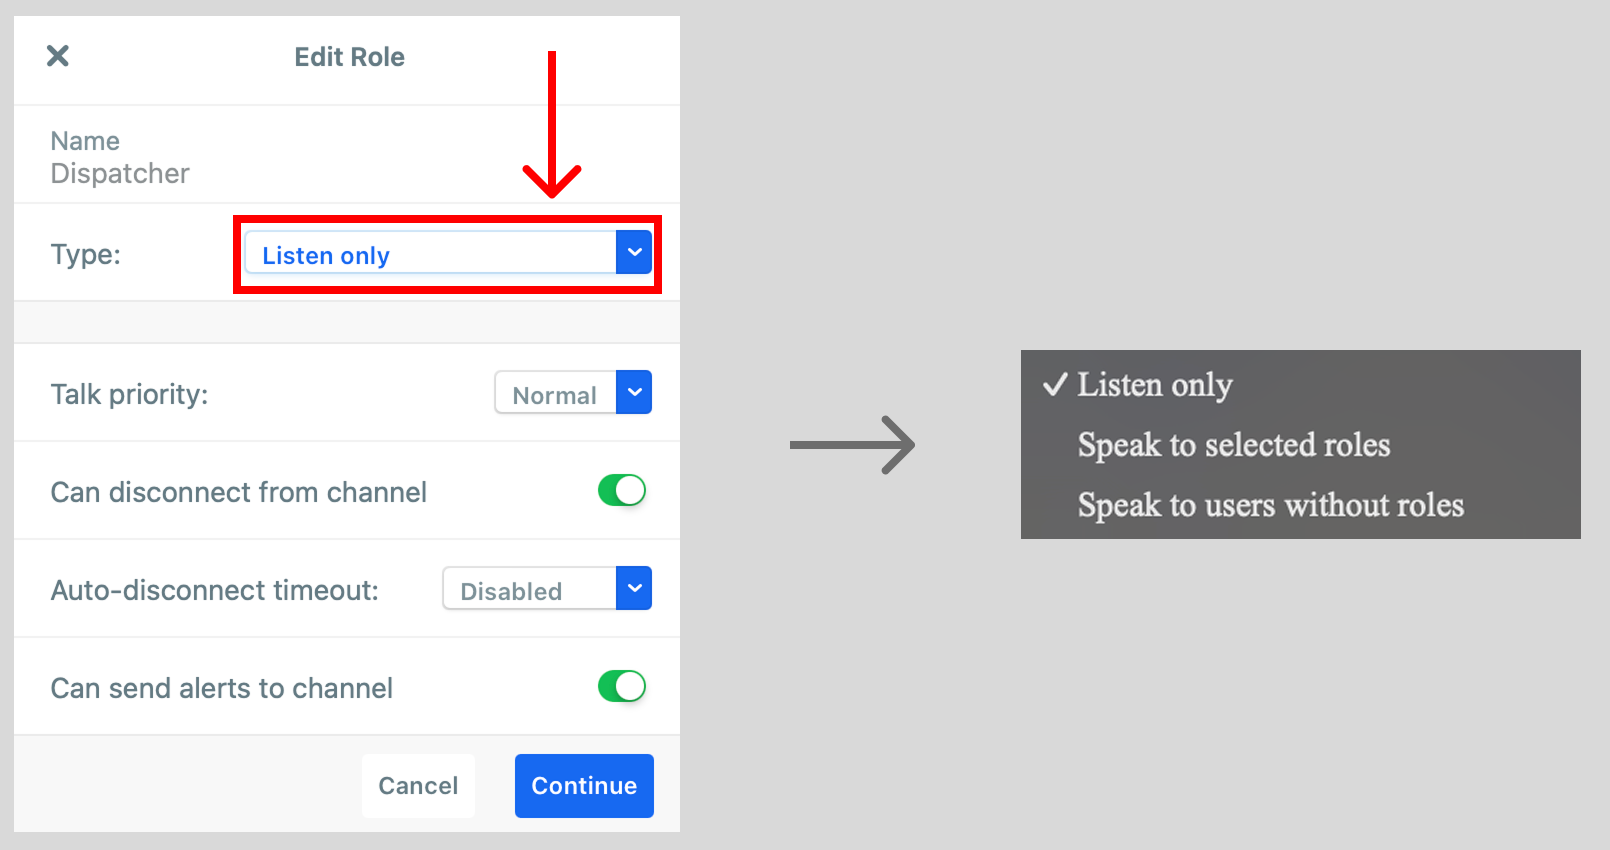
The role types differ when it comes to whom dispatchers are able to communicate with. When choosing a role type, make sure to take into account whether you would like your dispatchers to speak with the end user and with one another.Once you have selected the appropriate role type that you will be using, click Continue.
Tables can't be imported directly. Please insert an image of your table which can be found here.
Listen only
Speak to selected roles
Speak to users without roles
How to create a QR code
Prerequisite: In order to create a QR code you must already have a dispatch channel in your network that you will link the QR code to. Remember to check that dispatch channel to make sure that
- Within the Management Console, select QR Assist.

- Select + New QR Code.
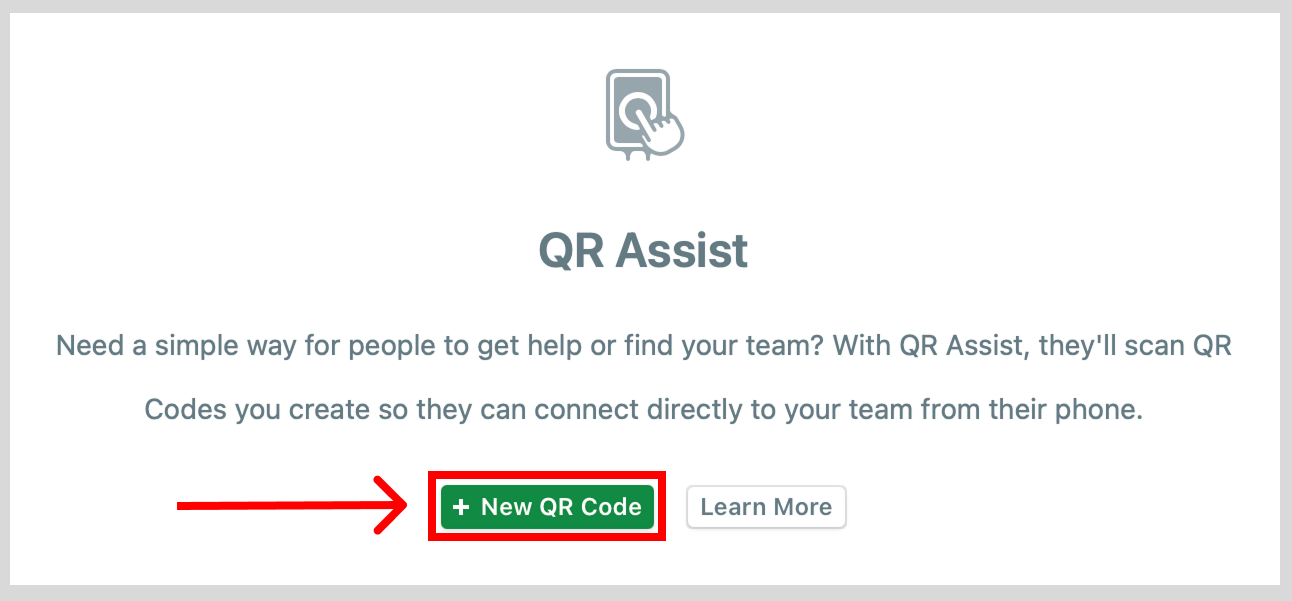
Note: If you have already generated a QR code before, you will need to click + New QR Code in the upper right corner of the QR Assist page.
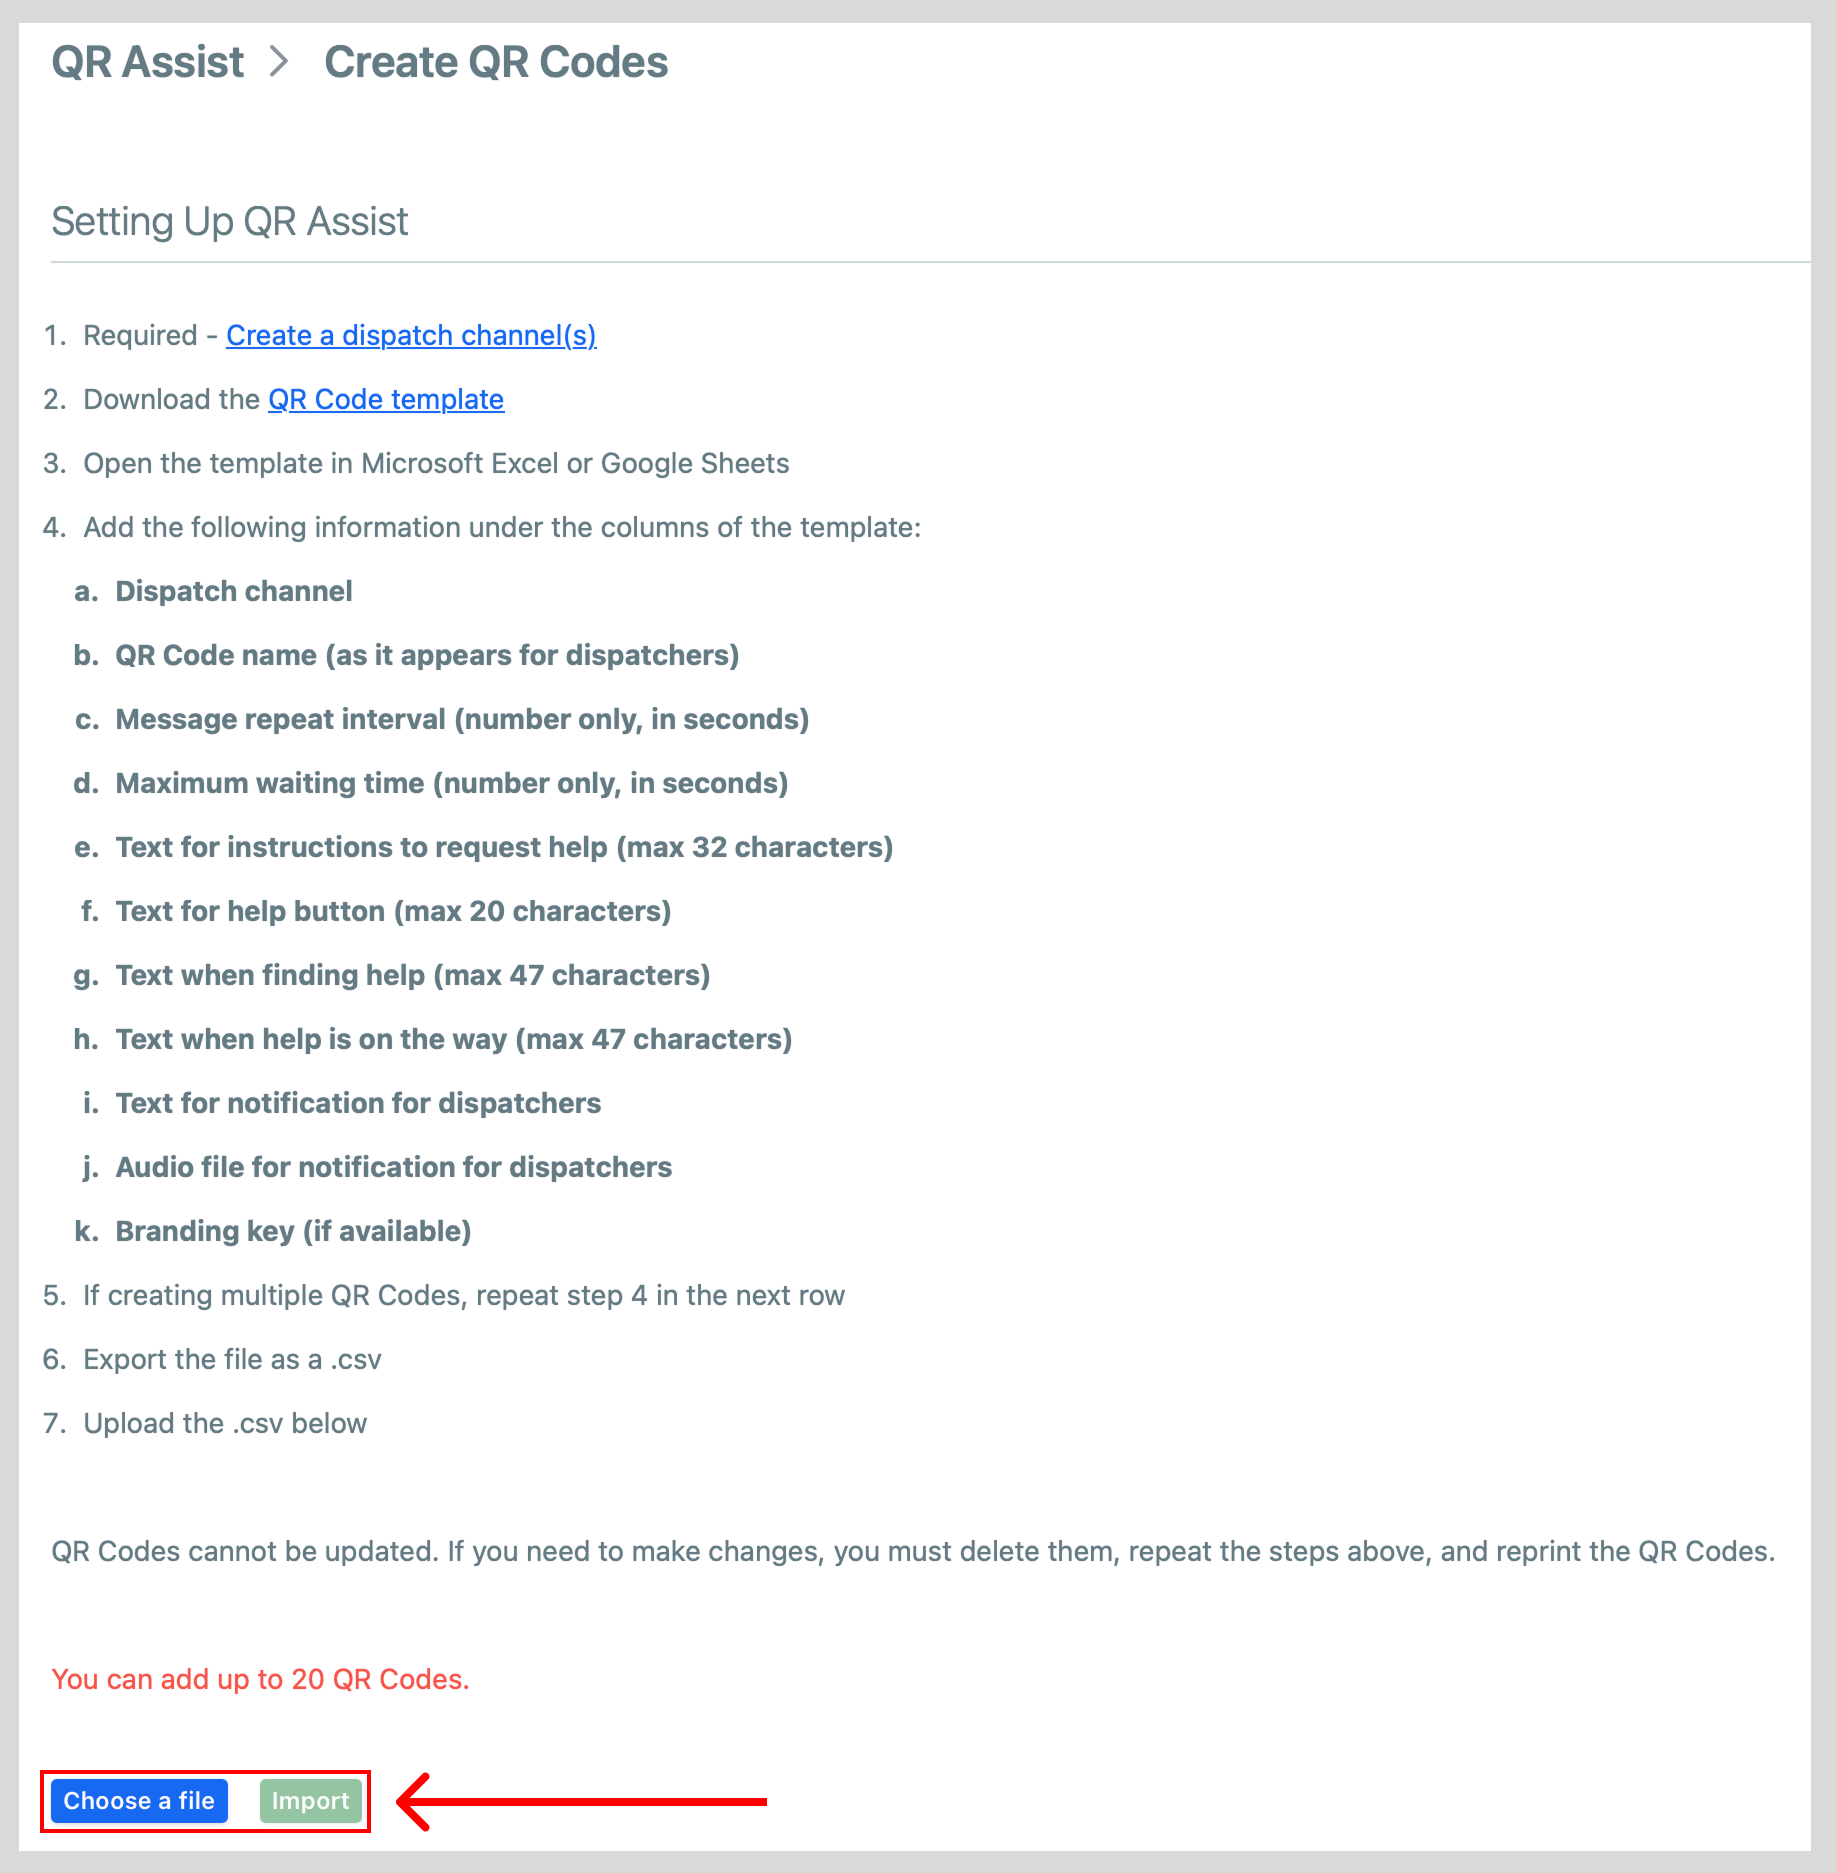
- Select QR Code template to download the CSV template.
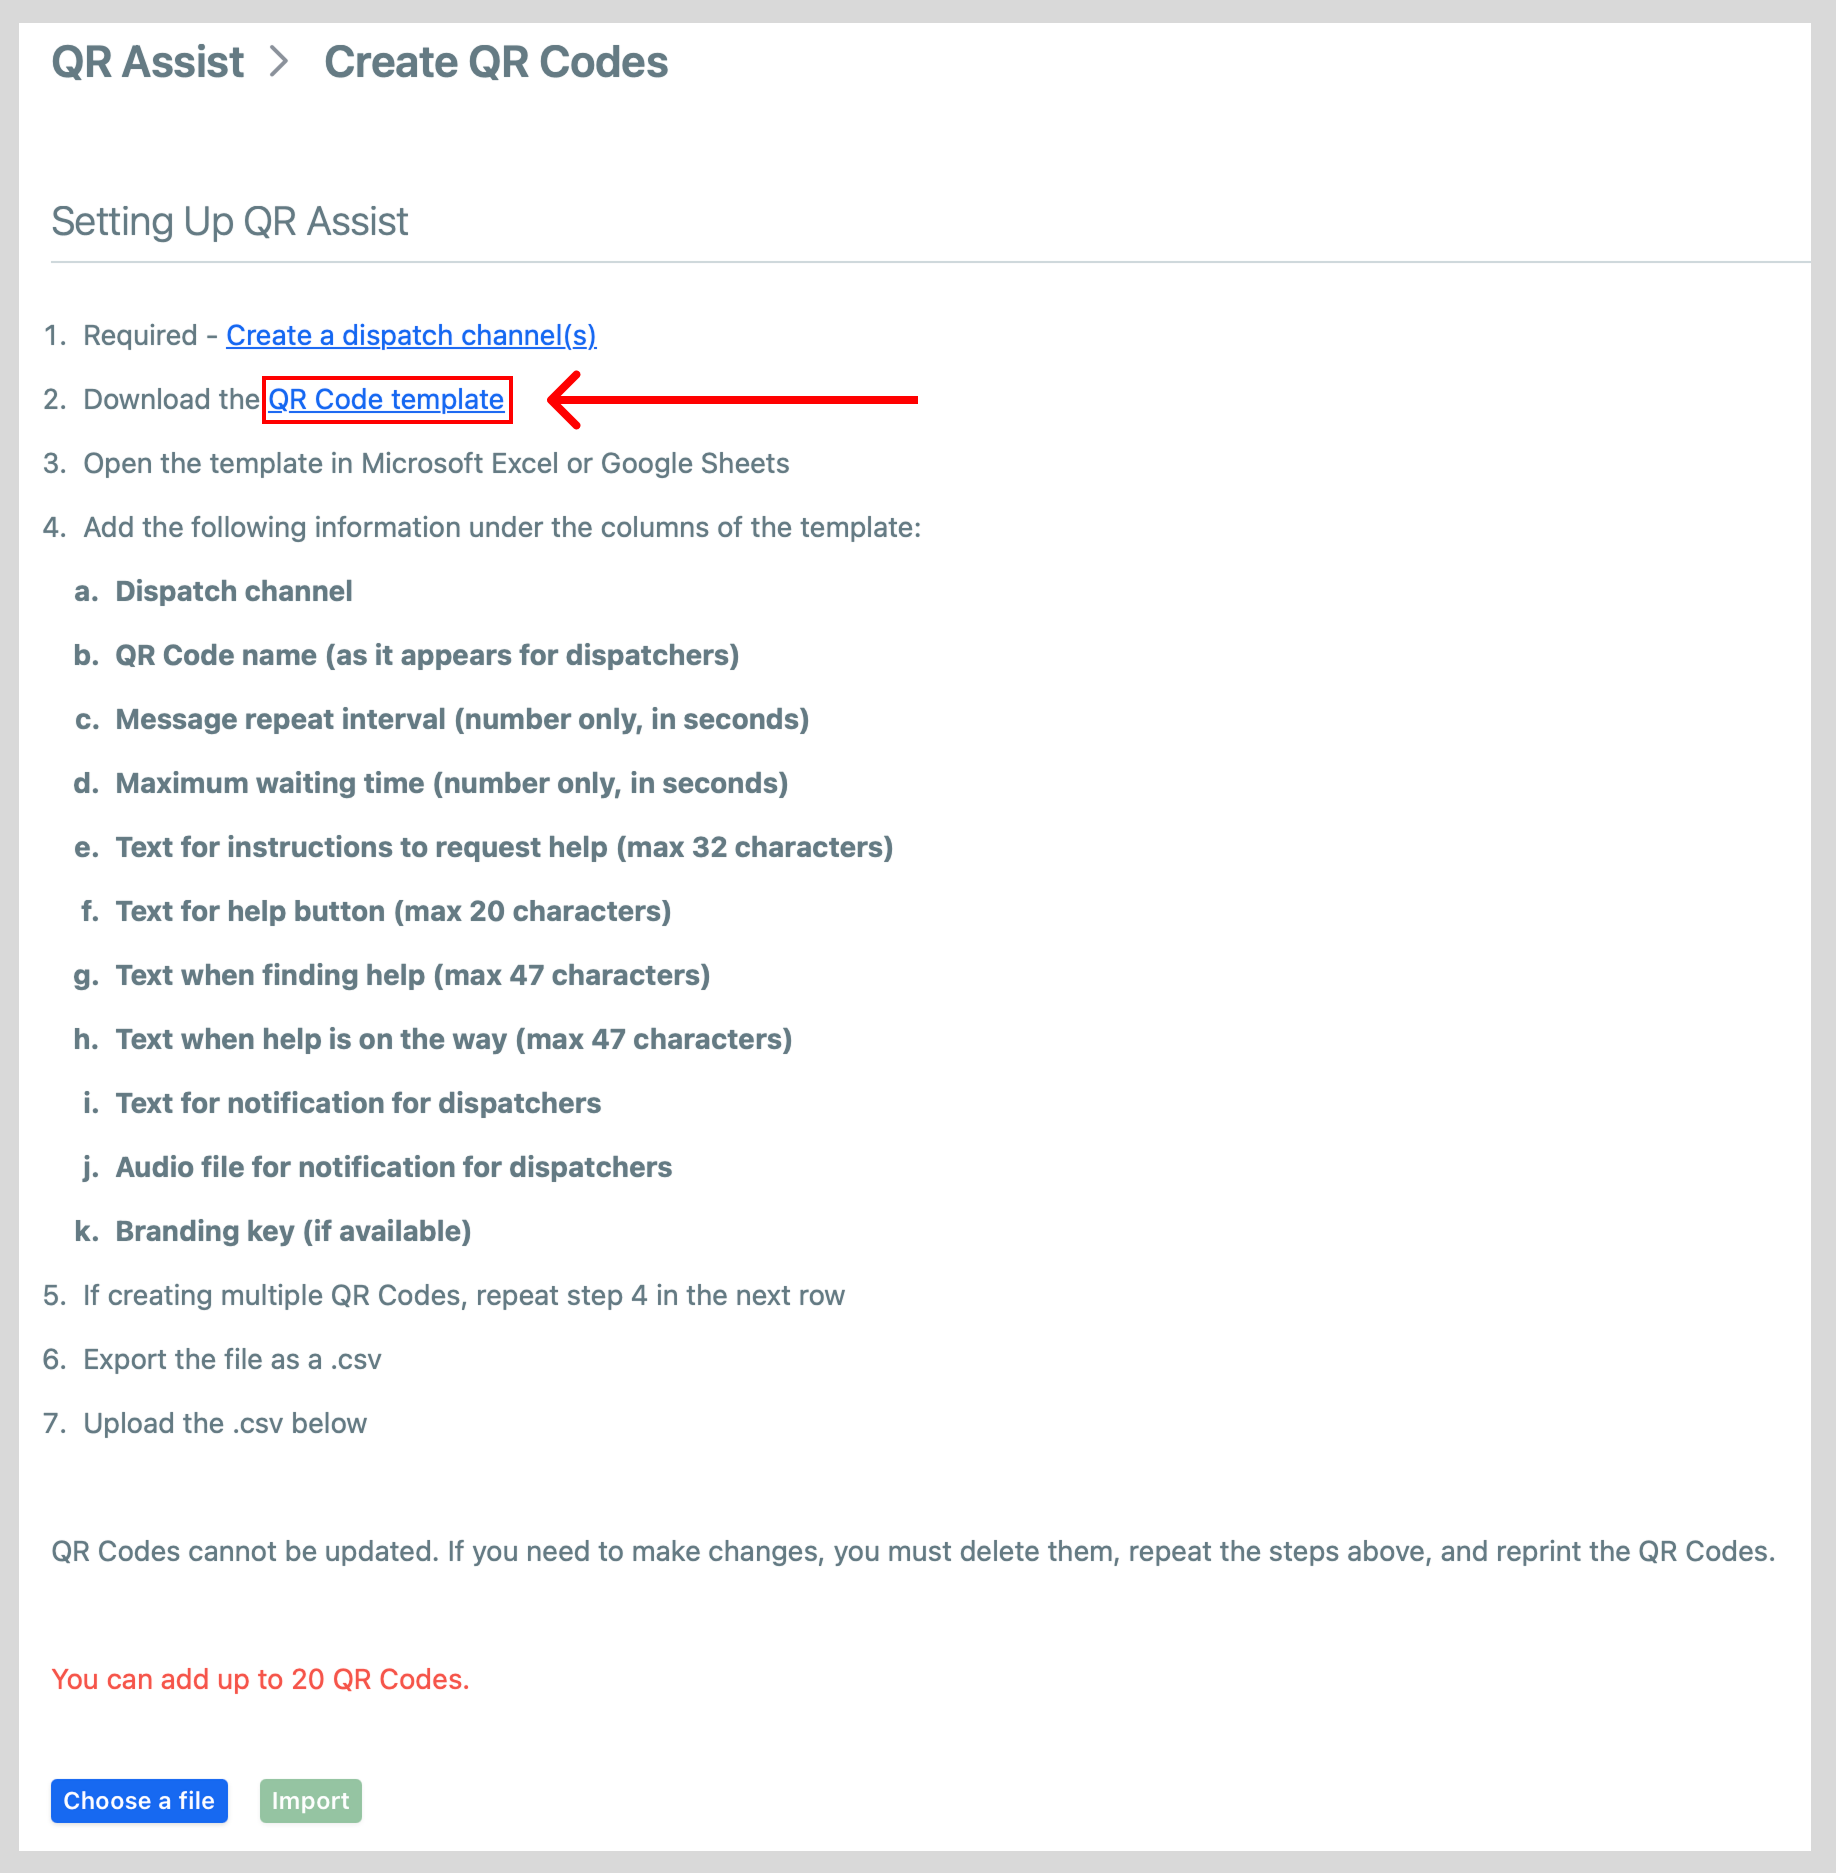
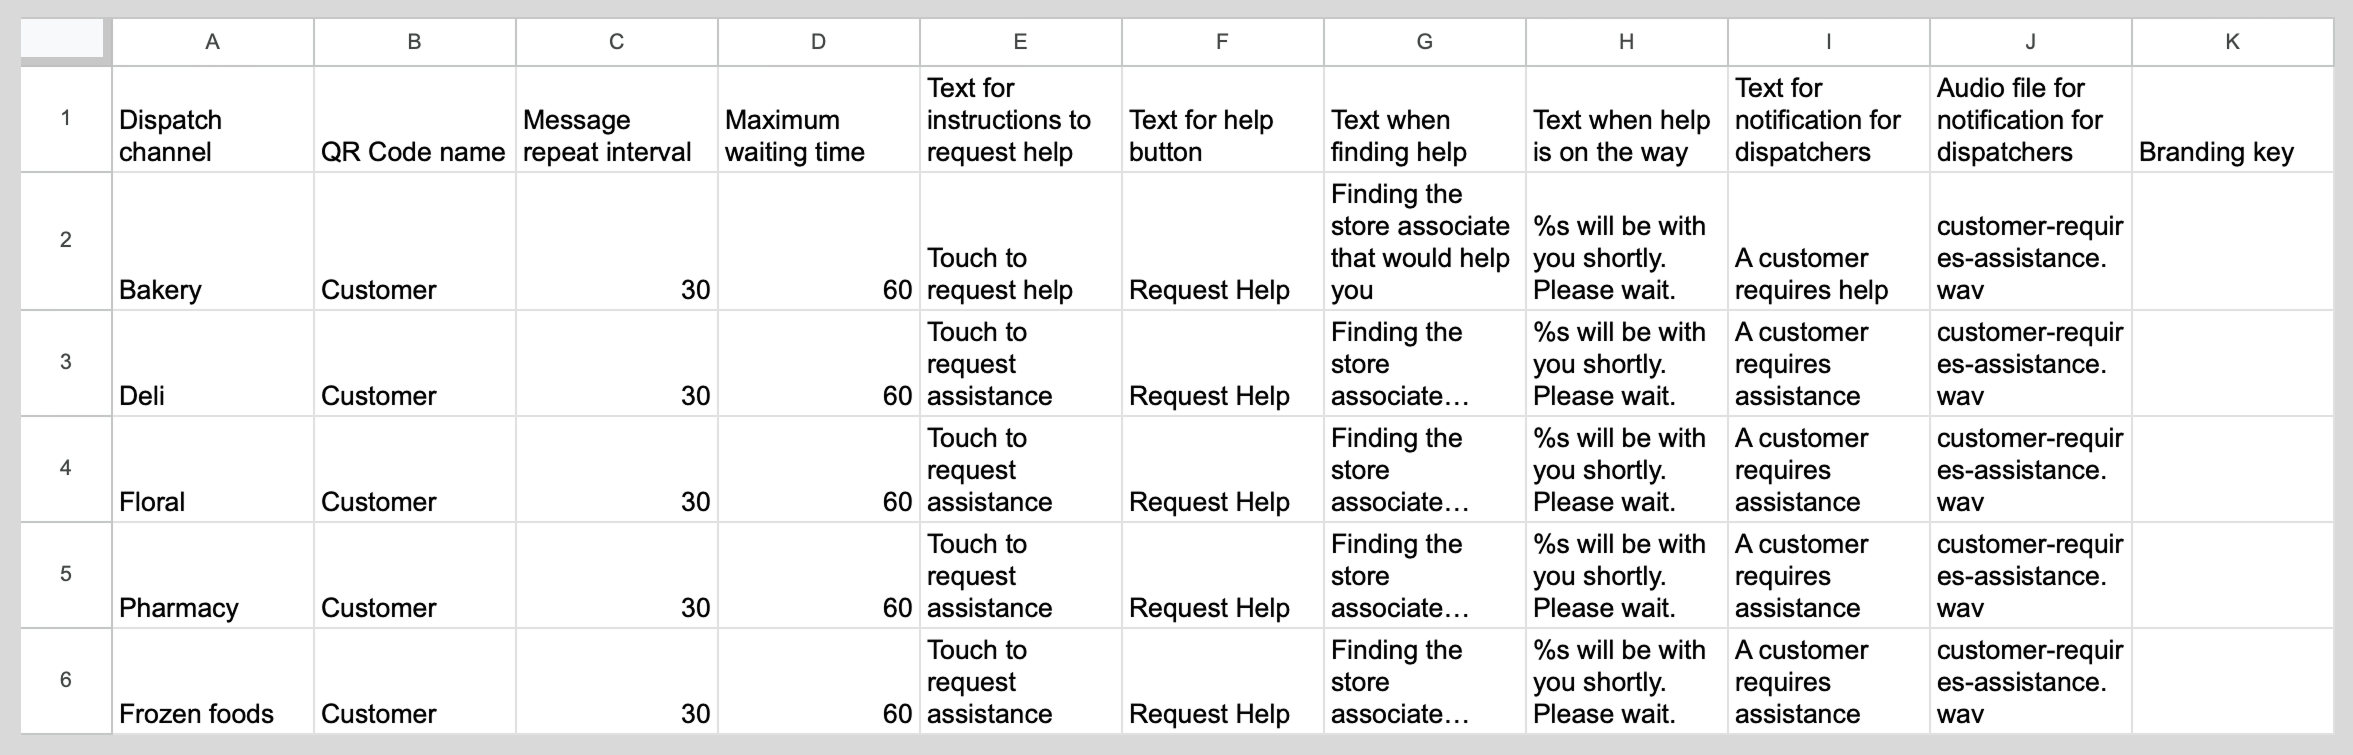
- The CSV template is set up to generate five different examples of QR codes. Each row of the CSV corresponds to a unique QR code. You will need to delete the unneeded ones and then fill in the appropriate information in each column. Make sure to adhere to character limits where stated. Once you are done, save the file as a CSV.
The following tabs describe the purpose of each CSV column and show which screens, if any, are affected if you change it.
- Dispatch channel – This is the name of the channel that you are using for QR Assist requests. The dispatch channel name entered into the CSV file must match exactly the name of the dispatch channel you will be using.
- QR Code name – This is the name that dispatchers will see when help is requested.
- Message repeat interval – This is the amount of time (in seconds) that QR Assist will wait to remind associates that there is a request.
- Maximum waiting time – This is the amount of time (in seconds) that the request will stay available for dispatchers to accept.
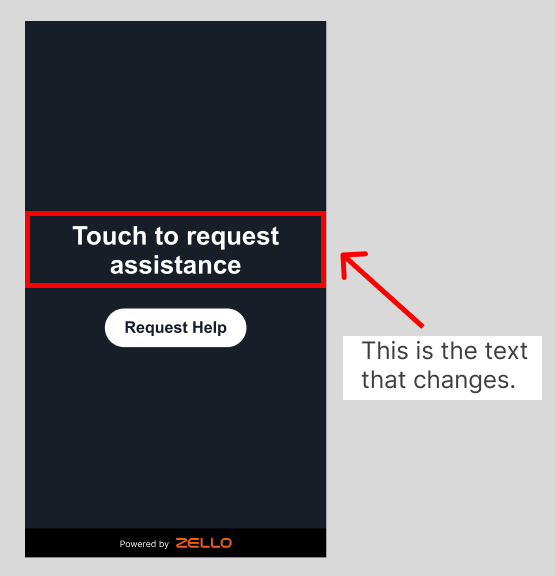
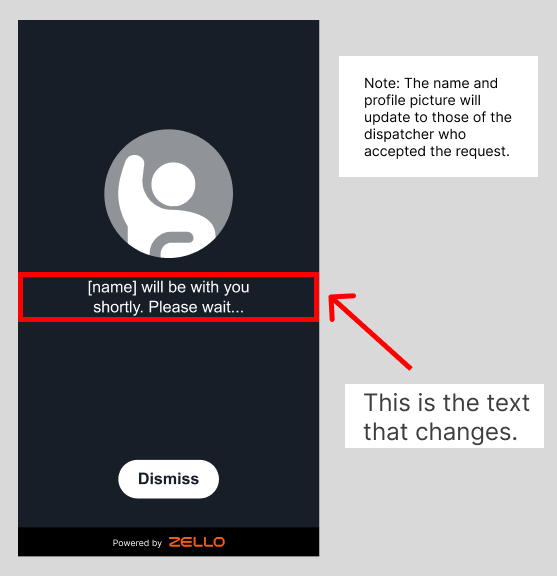
- Text for instructions to request help – This is the prompt that the end user sees when they scan the QR code. This message can be a max of 32 characters.
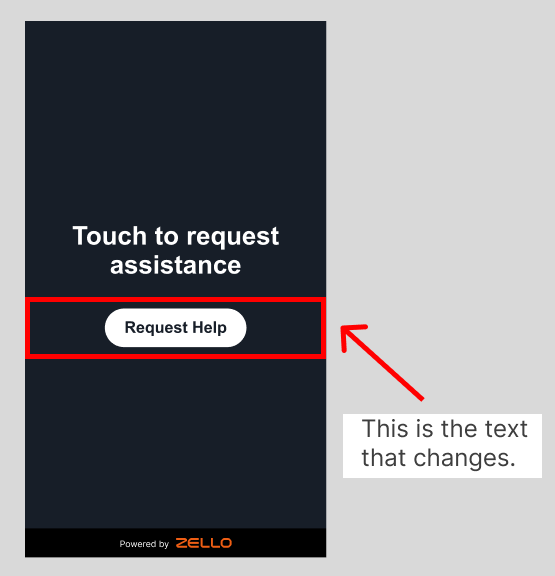
- Text for help button – This is the message that will appear on the button that end users will need to tap to send a request. This message can be a max of 20 characters.
- Text when finding help – This is the message that end users see once their request has been sent but is still waiting to be accepted by a dispatcher. This message can be a max of 47 characters.

- Text when help is on the way – This is the message that end users see once their request has been claimed by an associate. This message can be a max of 47 characters.
- Text for notification for dispatchers – This is the message that the dispatcher sees once an end user scans the QR code and requests help.
- Audio file for notification for dispatchers - This is the name of the audio file that will play to alert dispatchers that there is an available request.
- Branding key - The name of the file that changes the design on the QR Assist screens to include the branding for your company. (Note: The branding key is only available for an additional cost.)
- Once you have filled out and saved the CSV file, click Import File and choose the appropriate file. Then click Proceed.
Note: If the name you entered for the dispatch channel in the CSV file does not match the name of a dispatch channel in your network or you exceed the character limit, you will receive an error.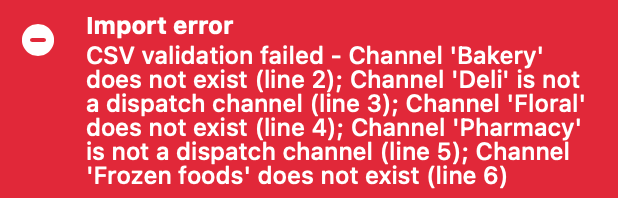
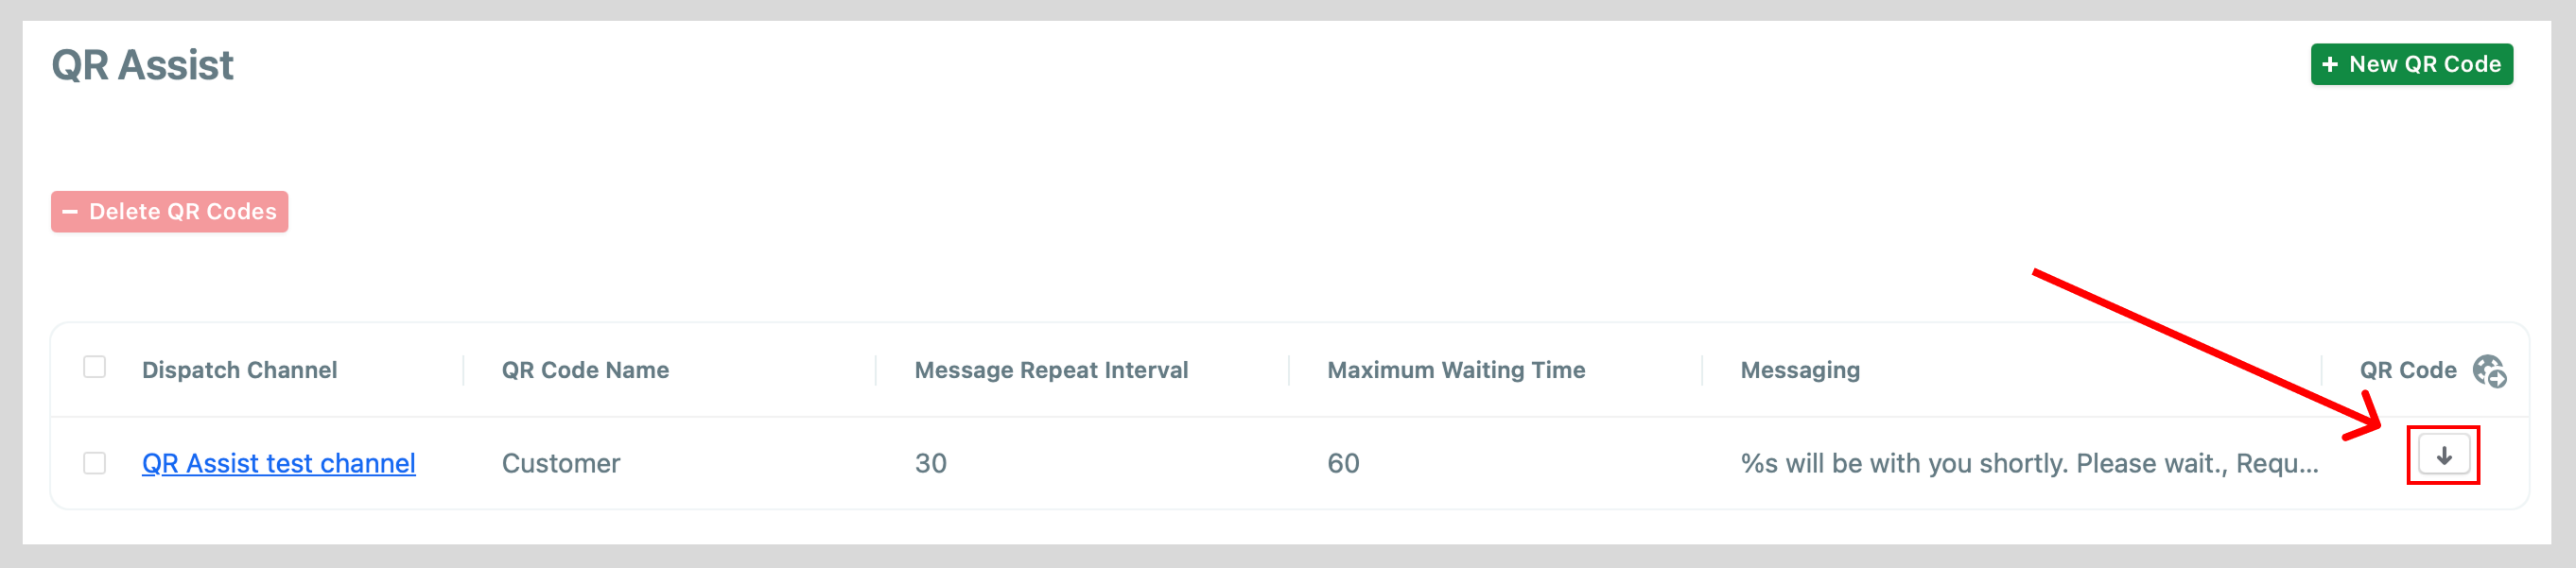
- Upon successfully importing the CSV file, the new QR code will appear on the QR Assist page in the Management Console. To download the QR code, click the arrow.
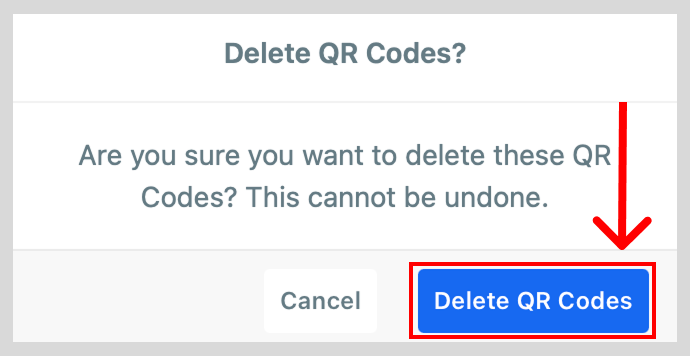
How to delete a QR code
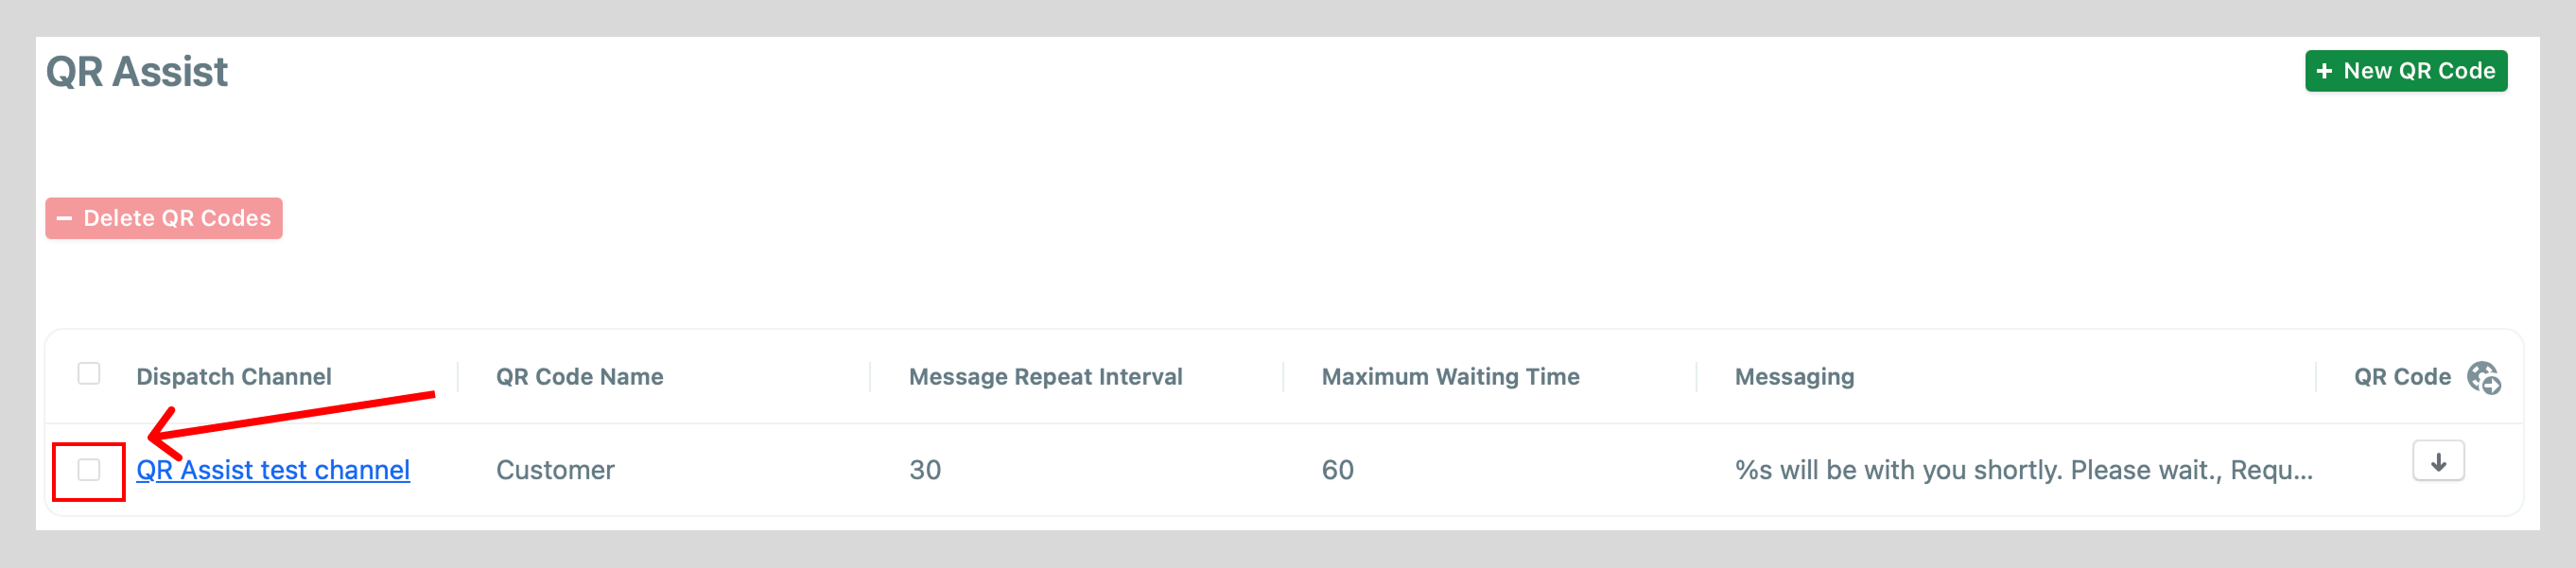
- Within the Management Console, select QR Assist.

- Click the checkbox on the row of the QR code that you would like to delete.
- Click - Delete QR Codes.
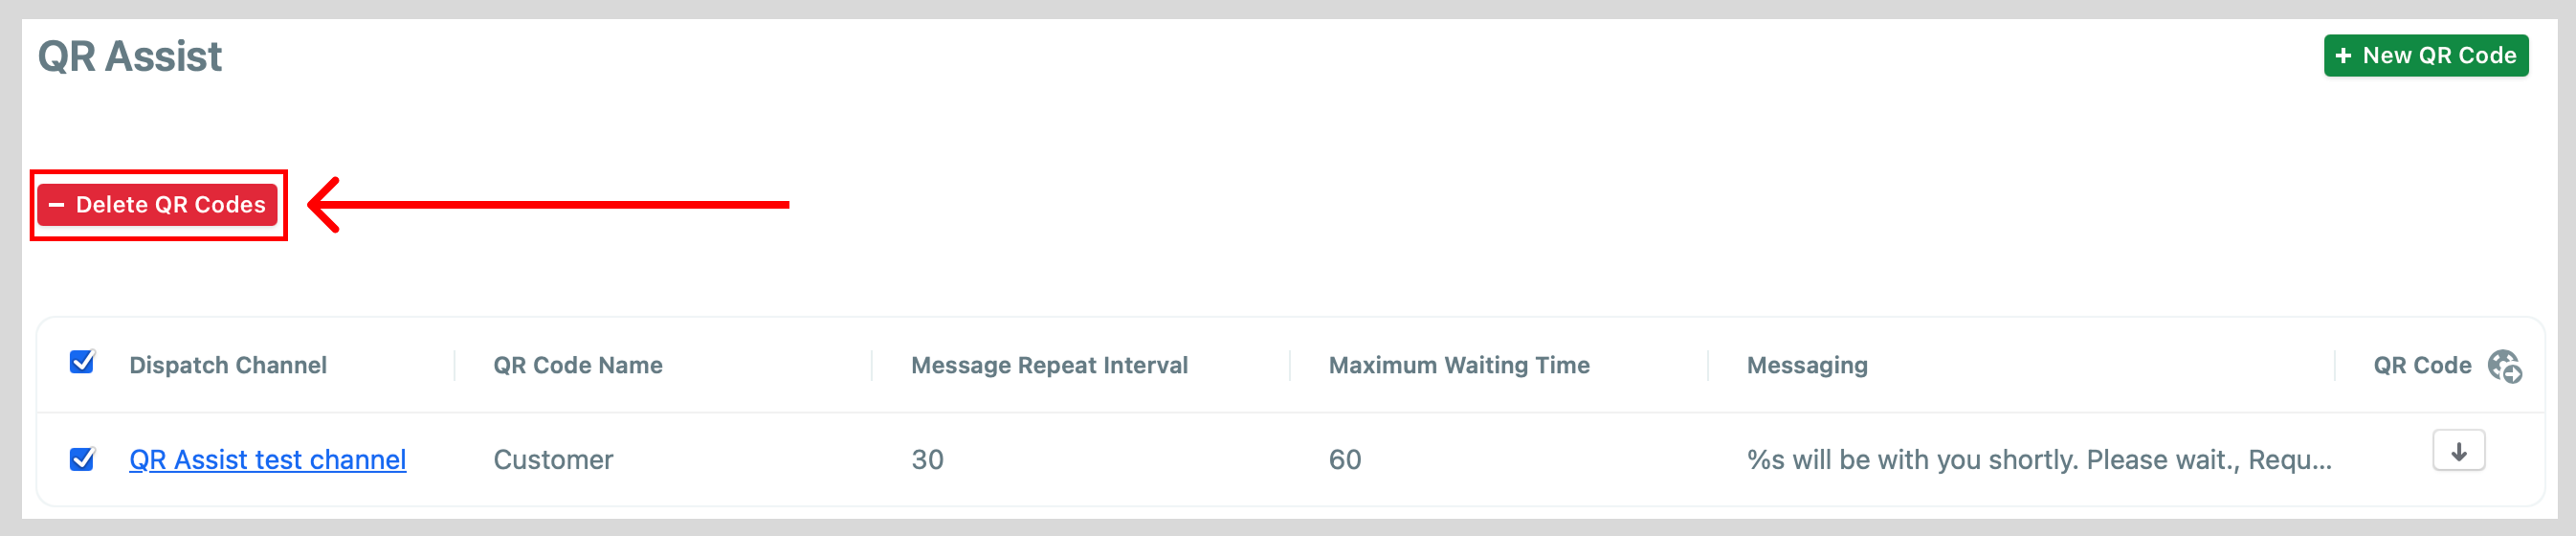
- Select Delete QR Codes.